ISY Z-Wave GenII - Instructions
Introduction
This module provides ISY support for Z-Wave in a way that integrates with other protocols running on the same ISY. For example, you may add a Z-Wave lamp into a scene with Insteon devices.
Supported devices
- Thermostats
- Lamp dimmers
- Appliance module (on/off)
- Schlage locks
- Kwikset locks
- Yale locks
Notes
- ISY can now replicate with other controllers
- Scenes are simulated through ISY
Features planned for future Alpha (or Beta) builds
- Support for additional devices
- Display and Edit device properties
- Native support for scenes (all forms supported by Z-Wave)
- Replacing a device
Known Issues
- Z-Wave range issues, especially with secure devices, have been a problem throughout development. We will continue to work to improve this.
Requirements & Installation
- ISY-994 Series with firmware version 4.1.1 or above (Help | About)
- Z-Wave Module - 21100 (Help | About). If you do not have the Z-Wave Module, please do make sure you have firmware 4.1.1 installed first and then use Admin Console | Help | Purchase Modules ($1.00) to have it purchased/activated
- Z-Wave Dongle, see Ordering/Assembly Instructions
- Insteon PLM plugged into Port A
ISY as the Primary Controller and the Z-Wave network is empty
At this point you may:
- Import an existing Z-Wave network using Replication
- Create a whole new Z-Wave network by adding devices directly from ISY
- Make another controller the Primary by shifting it from ISY to that controller
ISY as the Primary Controller and the Z-Wave network is not empty
At this point you may:
- Add more devices to the Z-Wave network directly from ISY
- Make another controller the Primary by shifting it from ISY to that controller
ISY as a Secondary Controller
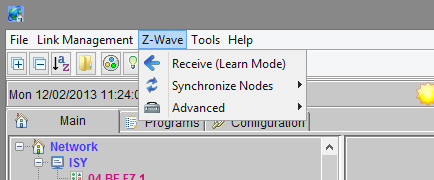
At this point you may put the ISY into learn mode and have the Primary controller for the network send the up-to-date information, and optionally shift Primary control to the ISY.
Importing an Existing Z-Wave Network
If you have the Primary Controller for your existing Z-Wave network, do the following to import the network into ISY.
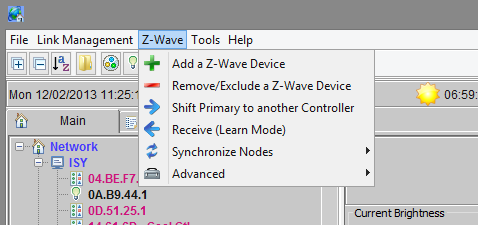
- From the Admin Console, Select Z-Wave -> Replicate (Learn Mode) and wait for a popup window to appear.
- If the popup window does not appear, Select 'Stop Adding or Removing a Z-Wave Device' from the advanced menu then try again.
- Use the instructions for your Primary Controller to add a new Z-Wave device (the ISY) to the network, and optionally shift Primary control to the ISY.
- Wait until the transfer is complete; the instructions for your Primary Controller should tell you what to look for (e.g. LEDs stop flashing, it beeps, etc.)
- The popup window will go away, and you will see the new Z-Wave devices appear in the ISY device tree
Adding Devices directly from ISY
- Make sure the ISY is the Primary Controller
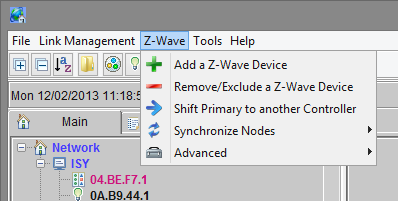
- Select Add a Z-Wave Device from the menu and wait for a popup window to appear.
- If the popup window does not appear, Select 'Stop Adding or Removing a Z-Wave Device' from the advanced menu then try again.
- Put the Z-Wave device in link mode. Refer to the user guide for your product on how to do this. In many cases, this just requires you to press a button on the device.
- The ISY will begin adding the device (this may occur a few seconds after you put the device in link mode)
- The popup window will go away, and you will see your device added to the tree.
Note
- All Secure devices such as door locks must be added to the ISY directly
Adding/Removing Devices Using Another Controller
- Shift Primary Control to the controller you want to use for including new Z-Wave devices into the network
- Add/Remove devices using the controller
- Either Shift Primary Control back to the ISY, or update the information in ISY
Shift Primary Control from ISY to a different Controller
- Select Z-Wave -> Shift Primary to another Controller and wait for a popup window to appear.
- If the popup window does not appear, Select 'Stop Adding or Removing a Z-Wave Device' from the advanced menu then try again.
- Put the other controller in Learn Mode. Refer to the user guid for your product on how to do this.
- The ISY will begin making the device the new Primary Controller
- The popup window will go away, and you will see your device added to the tree.
Shift Primary Control to ISY
- From the Admin Console, Select Z-Wave -> Replicate (Learn Mode)
- Use the instructions for your Primary Controller to start Replication that shifts Primary Control to another device.
- Wait until the transfer is complete; the instructions for your Primary Controller should tell you what to look for (e.g. LEDs stop flashing, it beeps, etc.)
- You should start seeing the Z-Wave devices appear in the ISY device tree
Update the ISY with Network changes
- From the Admin Console, Select Z-Wave -> Replicate (Learn Mode) and wait for a popup window to appear
- Use the instructions for your Primary Controller to include a device into the network
- Wait until the transfer is complete; the instructions for your Primary Controller should tell you what to look for (e.g. LEDs stop flashing, it beeps, etc.)
- You should start seeing the Z-Wave devices appear in the ISY device tree
Remove Devices
- Select Remove/Exclude a Z-Wave Device from the menu and wait for a popup window to appear.
- If the popup window does not appear, Select Stop Adding or Removing a Z-Wave Device from the advanced menu then try again.
- Put the Z-Wave device in link mode. Refer to the user guide for your product on how to do this. In many cases, this just requires you to press a button on the device.
- The ISY will remove the device (this may occur a few seconds after you put the device in link mode)
- The popup window will go away, but you will NOT see your device removed from the tree.
Notes
- Deleting a node from the ISY does not delete it from the Z-Wave dongle.
- When nodes are removed with a different controller, the ISY nodes are disabled instead of deleted. This is done in case the user accidentally removes ISY from the Z-Wave network, which essentially tells ISY that all nodes are deleted. We may change this behaviour based on Alpha feedback.
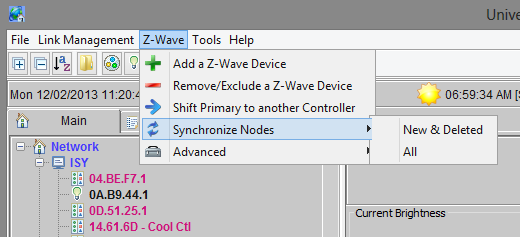
Synchronize Z-Wave Nodes
- Select New & Deleted to synchronize only those nodes have likely changed.
- Select All to synchronize all nodes whether they have changed or not.
Synchronizing ensures that the ISY and the Z-Wave network have the same device information for a node.
Synchronize one Z-Wave Node
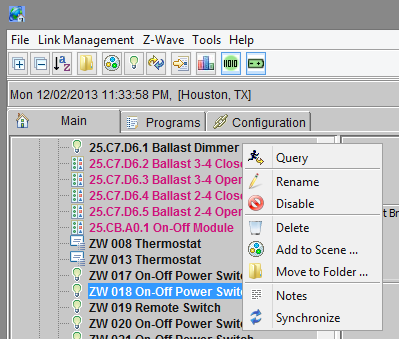
- Select Synchronize to synchronize this node only.
Antenna
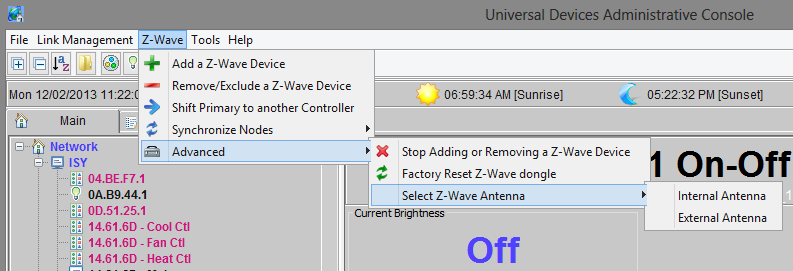
Choose the antenna the Z-Wave dongle should use (Internal or External). You must unplug ISY and then plug it back in for the settings to take effect.
Backup
Once you are happy with your configuration, it's extremely important to backup your Z-Wave dongle. To do so:
- Go to Z-Wave | Tools | Backup:
- Full - backs up the whole dongle including information that ISY does not need. This is a very long process which reads every byte of the EEPROM in the dongle and saves it. This method is rarely required
- Normal - this is a streamlined process which backs up only what ISY require to recreate everything in the dongle. This process is faster than Full and the one that should be normally used
Since Z-Wave backup files are stored in ISY itself, it's always best to also do a File | Backup ISY to backup your whole ISY.
Restore
Z-Wave backup files are stored in ISY itself. As such, the Restore process is as simple as:
- Go to Z-Wave | Tools | Restore
This operation takes all the information in the backup and programs the EEPROM in the Z-Wave dongle. Once the process is finished, you may want to do Z-Wave | Tools | Synchronize Nodes to make a mapping between devices/nodes in the dongle and ISY.
Please do ensure that you have a good backup before performing this operation.
Factory Reset
You may Factory Reset the Z-Wave dongle if it is not a member of a Z-Wave network. This erases all network information from the dongle, making it the Primary for an empty Z-Wave network.
Firmware Upgrade
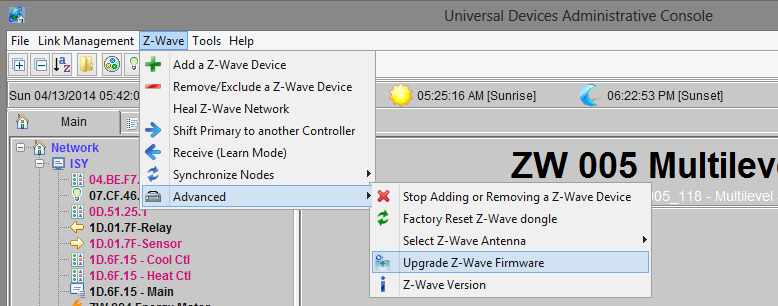
You may upgrade the firmware in the Z-Wave dongle if it is not a member of a Z-Wave network. This erases all network information from the dongle, making it the Primary for an empty Z-Wave network. You may also force it to upgrade even if you have an existing Z-Wave network.
Open the event viewer to see the progress of the firmware upgrade.
- If you want to preserve your existing Z-Wave network
- Shift primary control to a secondary controller (such as an Aeon minimote).
- Exclude ISY from the Z-Wave network
- Upgrade the Z-Wave firmware (Z-Wave -> Advanced -> Upgrade Z-Wave Firmware)
- Include ISY back into Z-Wave network
- Shift primary control back to the ISY
- NOTE: Even with this procedure, you may have to exclude your door locks and add them back in
- To do a fresh Z-Wave install or Overwrite your existing Z-Wave network
- Upgrade the Z-Wave firmware (Z-Wave -> Advanced -> Upgrade Z-Wave Firmware)
- Add all of your Z-Wave devices
