Polisy:User Guide
Welcome to our Polisy corner: your one place for anything Polisy!
Please see this important update (July 2022)
Some Definitions!
ISY on Polisy (IoP)
IoP is shorthand notation for ISY on Polisy. For the old timers, ISY is the code that runs on the 994, now running as an optimized and fast service on Polisy.
Node Servers
As you might already know, in ISY, everything is represented as a Node. These are things (or devices) that show up in your left navigation bar under ISY. A long time ago, these nodes were limited to INSTEON,X10/A10, Z-Wave, and Zigbee. Basically, protocols for which ISY994 had native support. We designed and developed node servers so that developers could integrate their things into ISY as nodes. And, hence, Node Servers: they serve nodes to ISY.
These nodes can be anything. They represent real devices such as Ring, Tesla, WiFi light bulbs, Ecobee, or they could be virtual such as calendars and climate services. Once a node is represented in ISY, then the whole ISY event based and programming environment are available to it. In short, Node Servers allow ISY to support pretty much any device or thing out there.
But, where do these node servers live? Well, you have come this far, so read on ...
Polyglot
Node servers have to run on some computing device. And, forcing each developer to have to come up with his/her own node server from scratch would be completely detrimental to our quest. So, we designed and developed Polyglot which is a framework that allows developers to develop their node servers with ease and confidence that all the plumbing/security and communications with ISY is handled automatically.
Polyglot version 3 (PG3) is the latest version of Polyglot which includes much enhanced functionality and, most importantly, enables the developers to charge for their node servers. PG3 is only available on Polisy.
Polisy
Polisy is our own shiny, beautiful, powerful hardware/OS preconfigured and optimized to run Polyglot (and other things). So, for those of you non-geeks out there, we have taken all the geekiness out of Polyglot and provided you with a ready to run box. So, now that we got you excited, let's continue with setting up and using your Polisy.
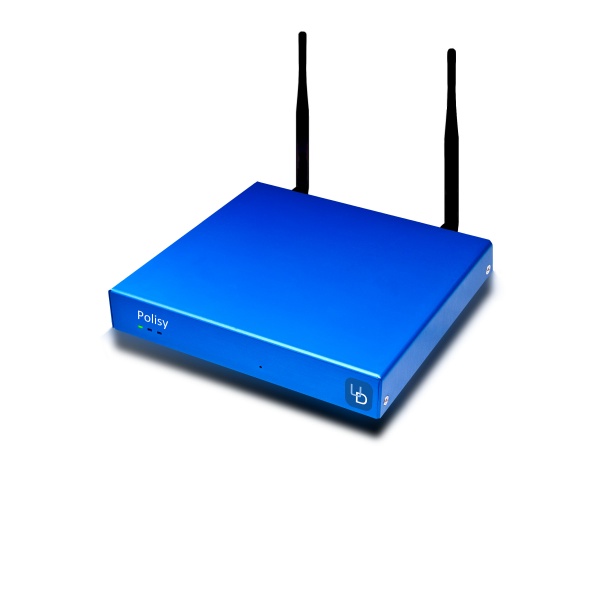
First Steps
Installation
Installation is quite easy
- Make sure your network has DHCP auto enabled
- Connect one end of the included Cat5e cable to Polisy’s Network Port and the other to your network. You must use the port that’s closest to the right most edge of Polisy when the front of Polisy is facing you (closest to the db-9 serial port). Note: the network must initially be DHCP auto enabled
- If you have the PRO version, attach the included antennas to the back of the unit.
- Connect the power supply
- Make sure the bootup sequence is as described below
Bootup Sequence
If this is Polisy's first bootup, please be patient as Polisy will go through an initial sequence of lights and sounds while it prepares itself for you. This process might take several minutes since it may have to update your BIOS:
- All three lights on the front light up when powered on
- If BIOS does not need to be updated, after a few seconds, only the left most stays lit for up to a minute and then, all lights turn off, you'll hear a couple of beeps
- If BIOS needs to be updated, the 2nd and 3rd light keep blinking while the BIOS is updated and the unit reboots and follows the normal process
- Everything is operational once only the left most light is lit either initially or after BIOS update
- If the 2nd or 3rd light keep blinking for more than 3 minutes, then there is an underlying issue. Please review the Troubleshooting section
Accessing Polisy
ISY Launcher is the best method to find and access all of Polisy's features
- Install ISY Launcher
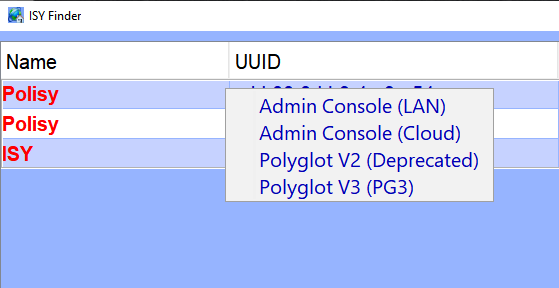
- Click on the row of the discovered Polisy and you will see this menu
Admin Console (LAN) This menu item downloads the ISY Admin Console directly from Polisy
Admin Console (Cloud) This menu item downloads the ISY Admin Console from the Universal Devices cloud servers
- Regardless of how you get to the ISY Admin Console (Cloud vs. LAN), the results are the same: Admin Console is brought up and connected directly to your Polisy. Admin Console allows you to add/remove/change Z-Wave/INSTEON devices, make programs, and make configuration changes. The best source for what you can do with the Admin Console is our ISY (994) Cookbook.
Polyglot V2 (Deprecated) This takes you to Polyglot V2 (PG2) Dashboard which allows you to add node servers (plugins for other devices) to your IoP. This site is deprecated in the favor or Polyglot V3.
Polyglot V3 (PG3) This takes you to Polyglot V3 (PG3) Dashboard.
Default Username and Password
admin | admin is the default username/password for everything in Polisy.
Setup ISY Portal for Remote Access/Alexa/GoogleHome/IFTTT
- Please go to ISY Portal, register for a 30 day trial
- If you are migrating from 994, make sure you complete the migration process from 994
Don't forget to check out all the things you can do with ISY Portal.
Mobile App
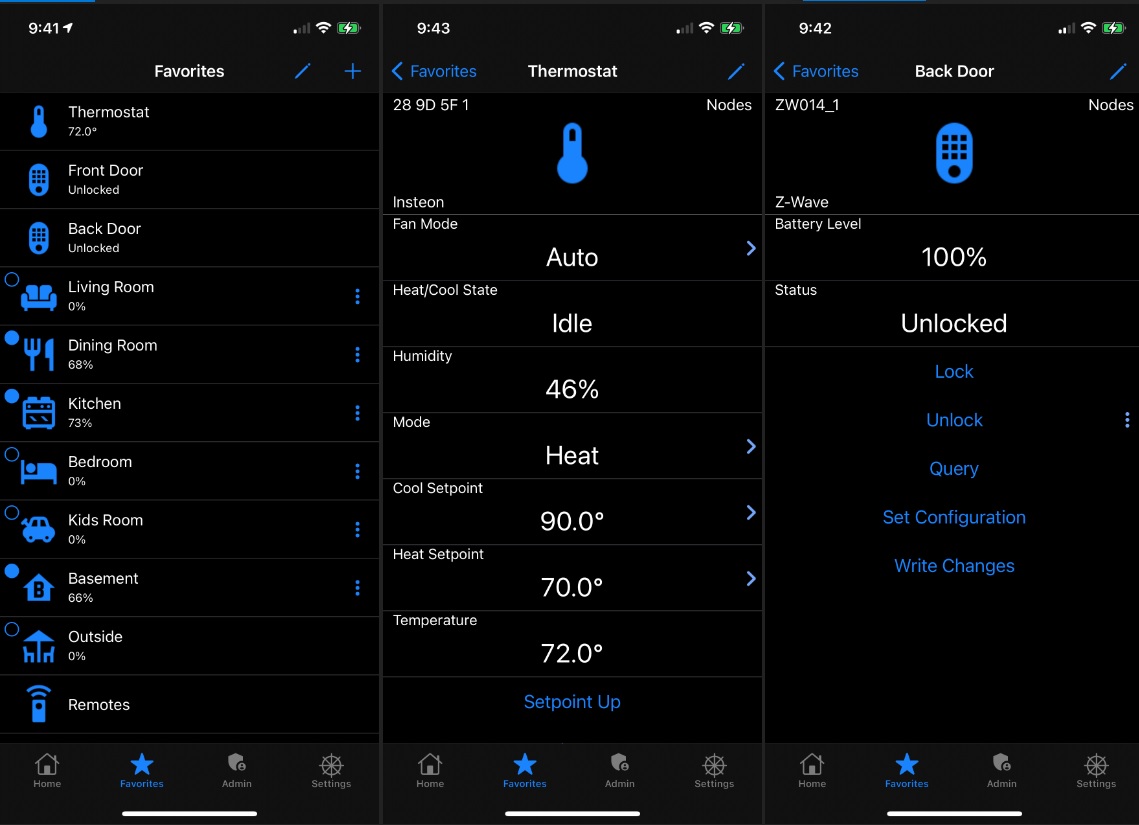
UD Mobile is everything you have ever dreamed of. It lets you control and monitor anything that's commissioned to your Polisy. And, it's FREE!
UD Mobile is developed by Universal Devices.
Forum support is available for UD Mobile.
Device Support
Z-Wave Support
Order ZMatter: ZMatter USB
- Ensure that ZMatter is installed properly. Here are the instructions
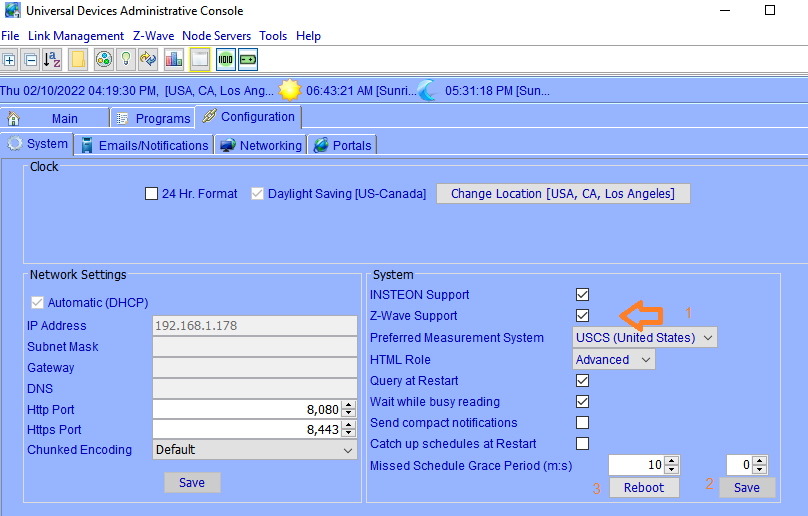
- Go to the Admin Console | Configuration tab
- Check Z-Wave Support Checkbox
- Click the Save button
- Click on the Reboot button. Here's the User Guide for Z-Wave.
Node Servers
Pick from anything in the Node Server Store and quench your thirst for integration!
INSTEON Support
- Connect the PLM to your Polisy
Polisy supports the following PLMs: 2412S and 2413S through the DB9 connector on the back. 2413U and 2448A7 through the USB port on the back. If you have a 2413S (serial), you will need our Serial PLM Kit
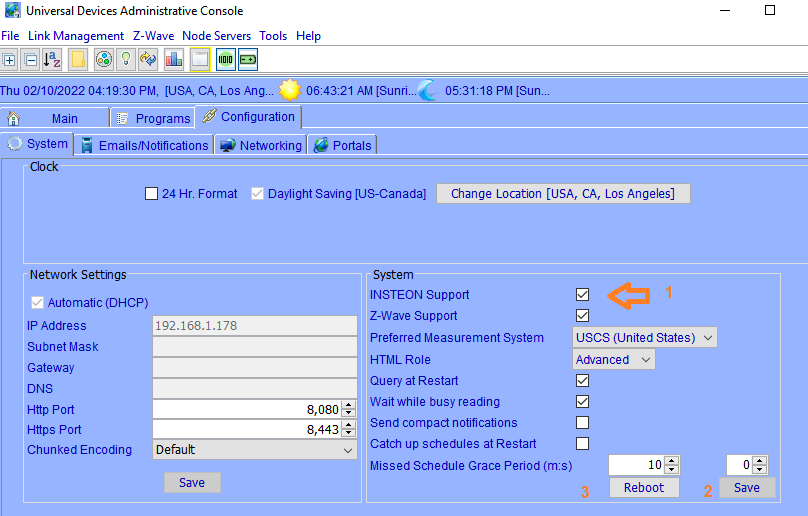
- Go to the Admin Console | Configuration tab
- Check INSTEON Support Checkbox
- Click the Save button
- Click on the Reboot button. Here's the INSTEON User Guide.
Migrating from 994 to Polisy
Order ZMatter: ZMatter USB
Use these instructions to migrate: Migrating from ISY-994 to Polisy or Eisy
Polisy (PG3) Dashboard
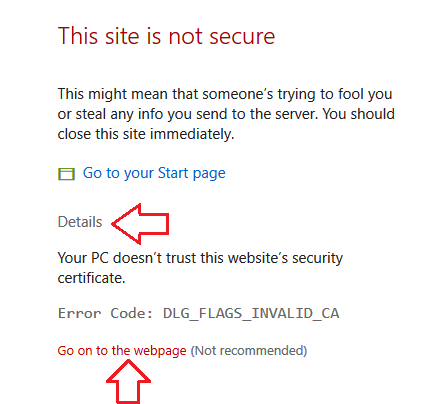
You will be prompted with a security warning by your browser because polisy uses a self-signed certificate. Please ignore the warning.
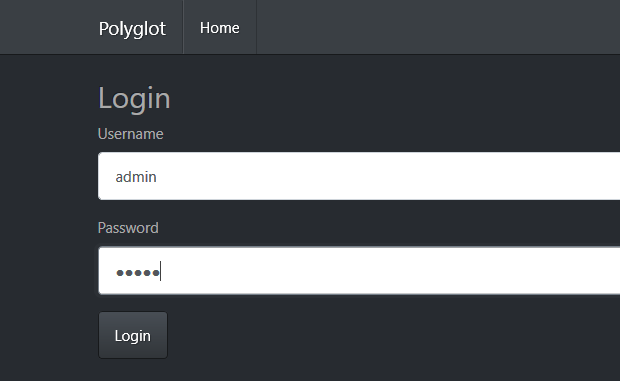
You are then presented with the login screen. The default username is admin and default password is admin. Please make sure you change your default username/password once you login.
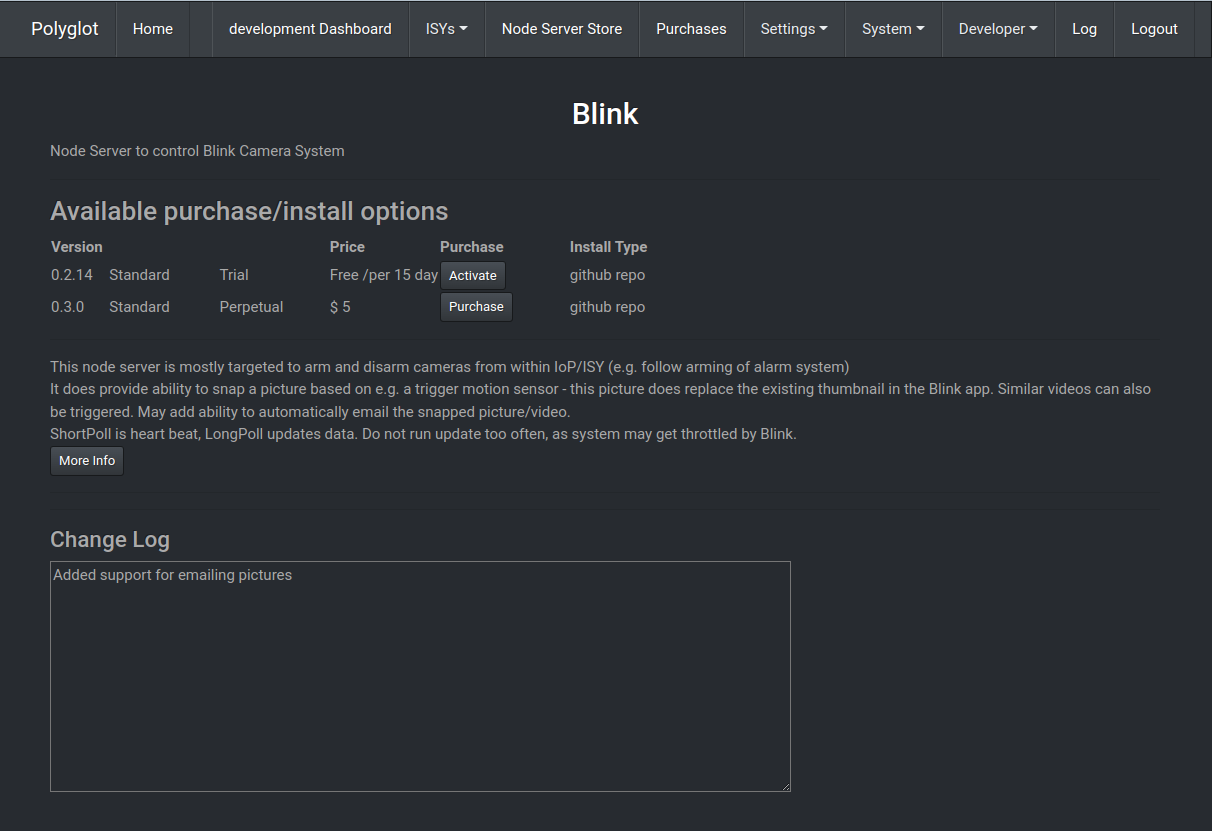
Once you have successfully logged into Polisy, you will get the Polisy Dashboard which is designed to be simple and functional.
ISYs
You can add/remove ISYs or IoPs through this menu. The first thing you need to do is to add the local IoP to the list of ISYs.
- Click on the Add New ISY menu
- Fill out the entries as shown in the picture below
- Make sure you use HTTP and not HTTPS
NodeServer Store Menu
This is where all the available node servers are listed. In order to install one of these node servers into ISY/IoP:
- Click on the name of the Node Server you wish to purchase/install
- Additional information about the Node Server will be displayed, including the purchase/install options available.
There are 4 possible purchase options that may be available:
- Trial. Activating a trial license will make the Node Available for the trial period. When selected, the Activate button should change to an Install button.
- Free. Free Node Servers will simply show an Install button and are available to be immediately installed.
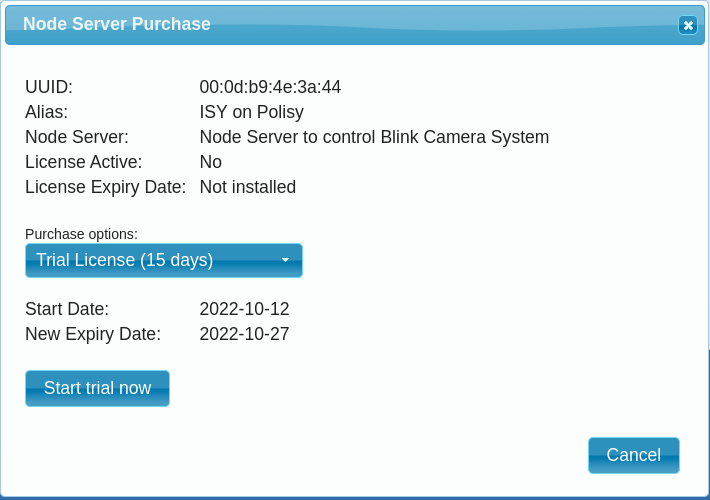
- Purchase. Clicking the Purchase button will re-direct you to the Portal purchasing system where you can purchase an license for the Node Server (see steps below).
- Subscription. Click the Purchase button for a subscription will re-direct you to the Portal purchasing system where you can purchase a license for a specific time period.
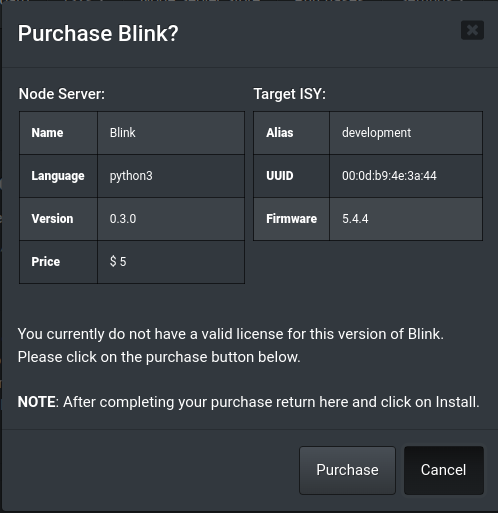
The Purchase Info displays basic info about the node server and which ISY/IoP is currently being manages. Once you've confirmed this is what you wanted, click the Purchase button to re-direct to the Portal purchasing system. You may be asked to log-in to the Portal to complete the following steps.
The Portal purchasing system will give you the option to select the type of license you wish to purchase. Use the drop down box to select the license and then click the button to continue with the payment options.
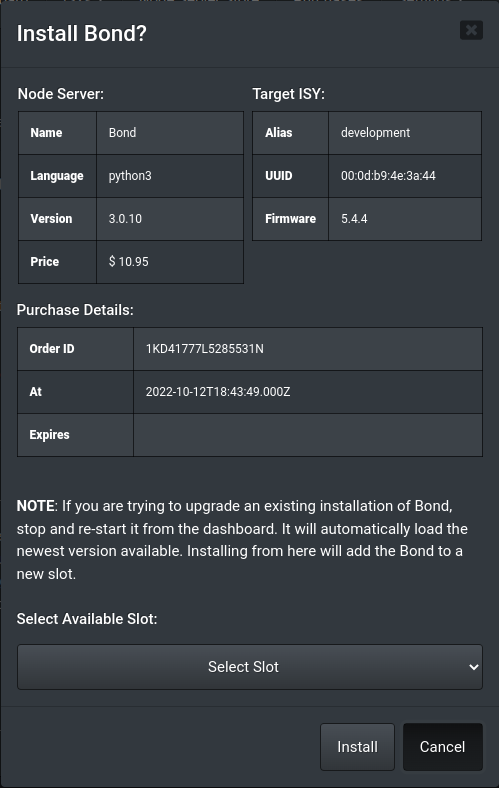
Once a node server license has been purchased, you will be re-directed back to PG3. Navigate back to the node server store and again select the node server you just purchased. The node server details page will now show an Install button instead of a Purchase button. Clicking the Install button will display the node server installation screen.
If this is the first time installing this node server, you must select an empty slot before installing. If you have previously installed this node server, you will be given the option to re-install it into the slot where it is currently installed.
Once installed, it should show up in the PG3 Dashboard.
Purchases
This is where all your node server purchases show up. These node servers are tied to your Polisy.
Upgrading to PG3x
- Enable PG3x: https://polisy.local:8443/rest/pg3x.enable
- Reboot and wait for a beep, then a second beep.
- At that point, PG3x should be started. You can access PG3x using the same url as PG3. It is using the same host and same port. Note: username/password are changed. For PG3x, you will need to use the same username/password as your Admin Console.
- If you can't get in PG3x, then you may have to clear your browser history. You can also try another browser as a test.
- All plugins will be reinstalled by PG3x. You will each plugins disconnect/reconnect, and messages as well.
- Migrating node servers from PG3 to PG3x might take up to 2 minutes per plugin. So, please be patient
- Once all node servers show connected, reboot again.
NOTE: This process will remove PG2 and PG3. Furthermore, there is no "undo" for this process. Please make sure you take a PG3 backup first.
Multi Function Button
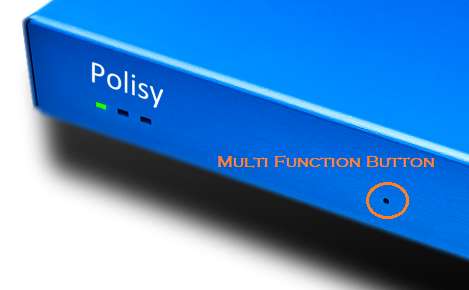
There's a little multi function button behind the very small hole on the front of the unit. This button has multiple purposes outlined below. Every click on the button will cause the unit to beep.
If the button does not behave as described below, please update Polisy.
Update and Upgrade All the Packages
Click the button once. Please consult support before updating this route. See link below for suggested update/upgrade process.
Please see this important update (July 2022)
Safely Reboot
Click the button twice.
Safely Shutdown
Click the button three times.
Reset Credentials
Press and hold the button till the first LED (from the left) starts blinking then release.
This action resets the following passwords to the default (admin/admin):
- SSH
- Polyglot v2
- ISY on Polisy (IoP)
Be sure to change the passwords for these sections after you log-in again.
Reset Networking
Press and hold the button till the first and second LEDs (from the left) start blinking then release. This action resets all network configuration back to DHCP on the Ethernet jack next to the serial port. All other network interfaces shall be disabled.
Factory Reset
Press and hold the button till all LEDs start blinking then release. This action resets the credentials, removes all configurations from Polyglot/Polisy, and resets networking.
Troubleshooting
First and Foremost
- Make sure you have connected the network cable to the right jack on the back of the unit (the right most when Polisy is facing you)
- Make sure your router is initially DHCP enabled
Can't Find Polisy
First and foremost, all VPN software block discovery of Polisy on your network. As such, if you have a VPN software running, please turn it off.
If you have a modern router, Polisy advertises itself as polisy on your network. As such, and in most cases, you should be able to find Polisy at https://polisy:8443/desc. What you need to do is:
- In ISY Launcher, click on the Add button
- Enter https://polisy:8443/desc into the dialog
- Click on the OK button
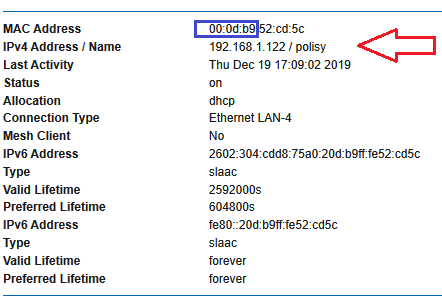
If you are still having a hard time finding your Polisy, it's best to check your router's DHCP client list and look for a device that has the same MAC address as the one the label at the bottom of your Polisy. Polisy's MAC address starts with 00:0d:b9.
Once you find the IP address for Polisy, in this example, 192.168.1.122, then
- In ISY Launcher, click on the Add button
- Enter https://192.168.1.122:8443/desc into the dialog. Note 192.168.1.122 is an example. You should use the IP address for your Polisy
- Click on the OK button
The Second or Third Light Is Blinking
- Signature failure
- Old BIOS
Please contact support.
The Third Light Is Constantly On While Everything Else Is Off
- This means that that flash chip is corrupted
- Request a Flash Chip from support@universal-devices.com
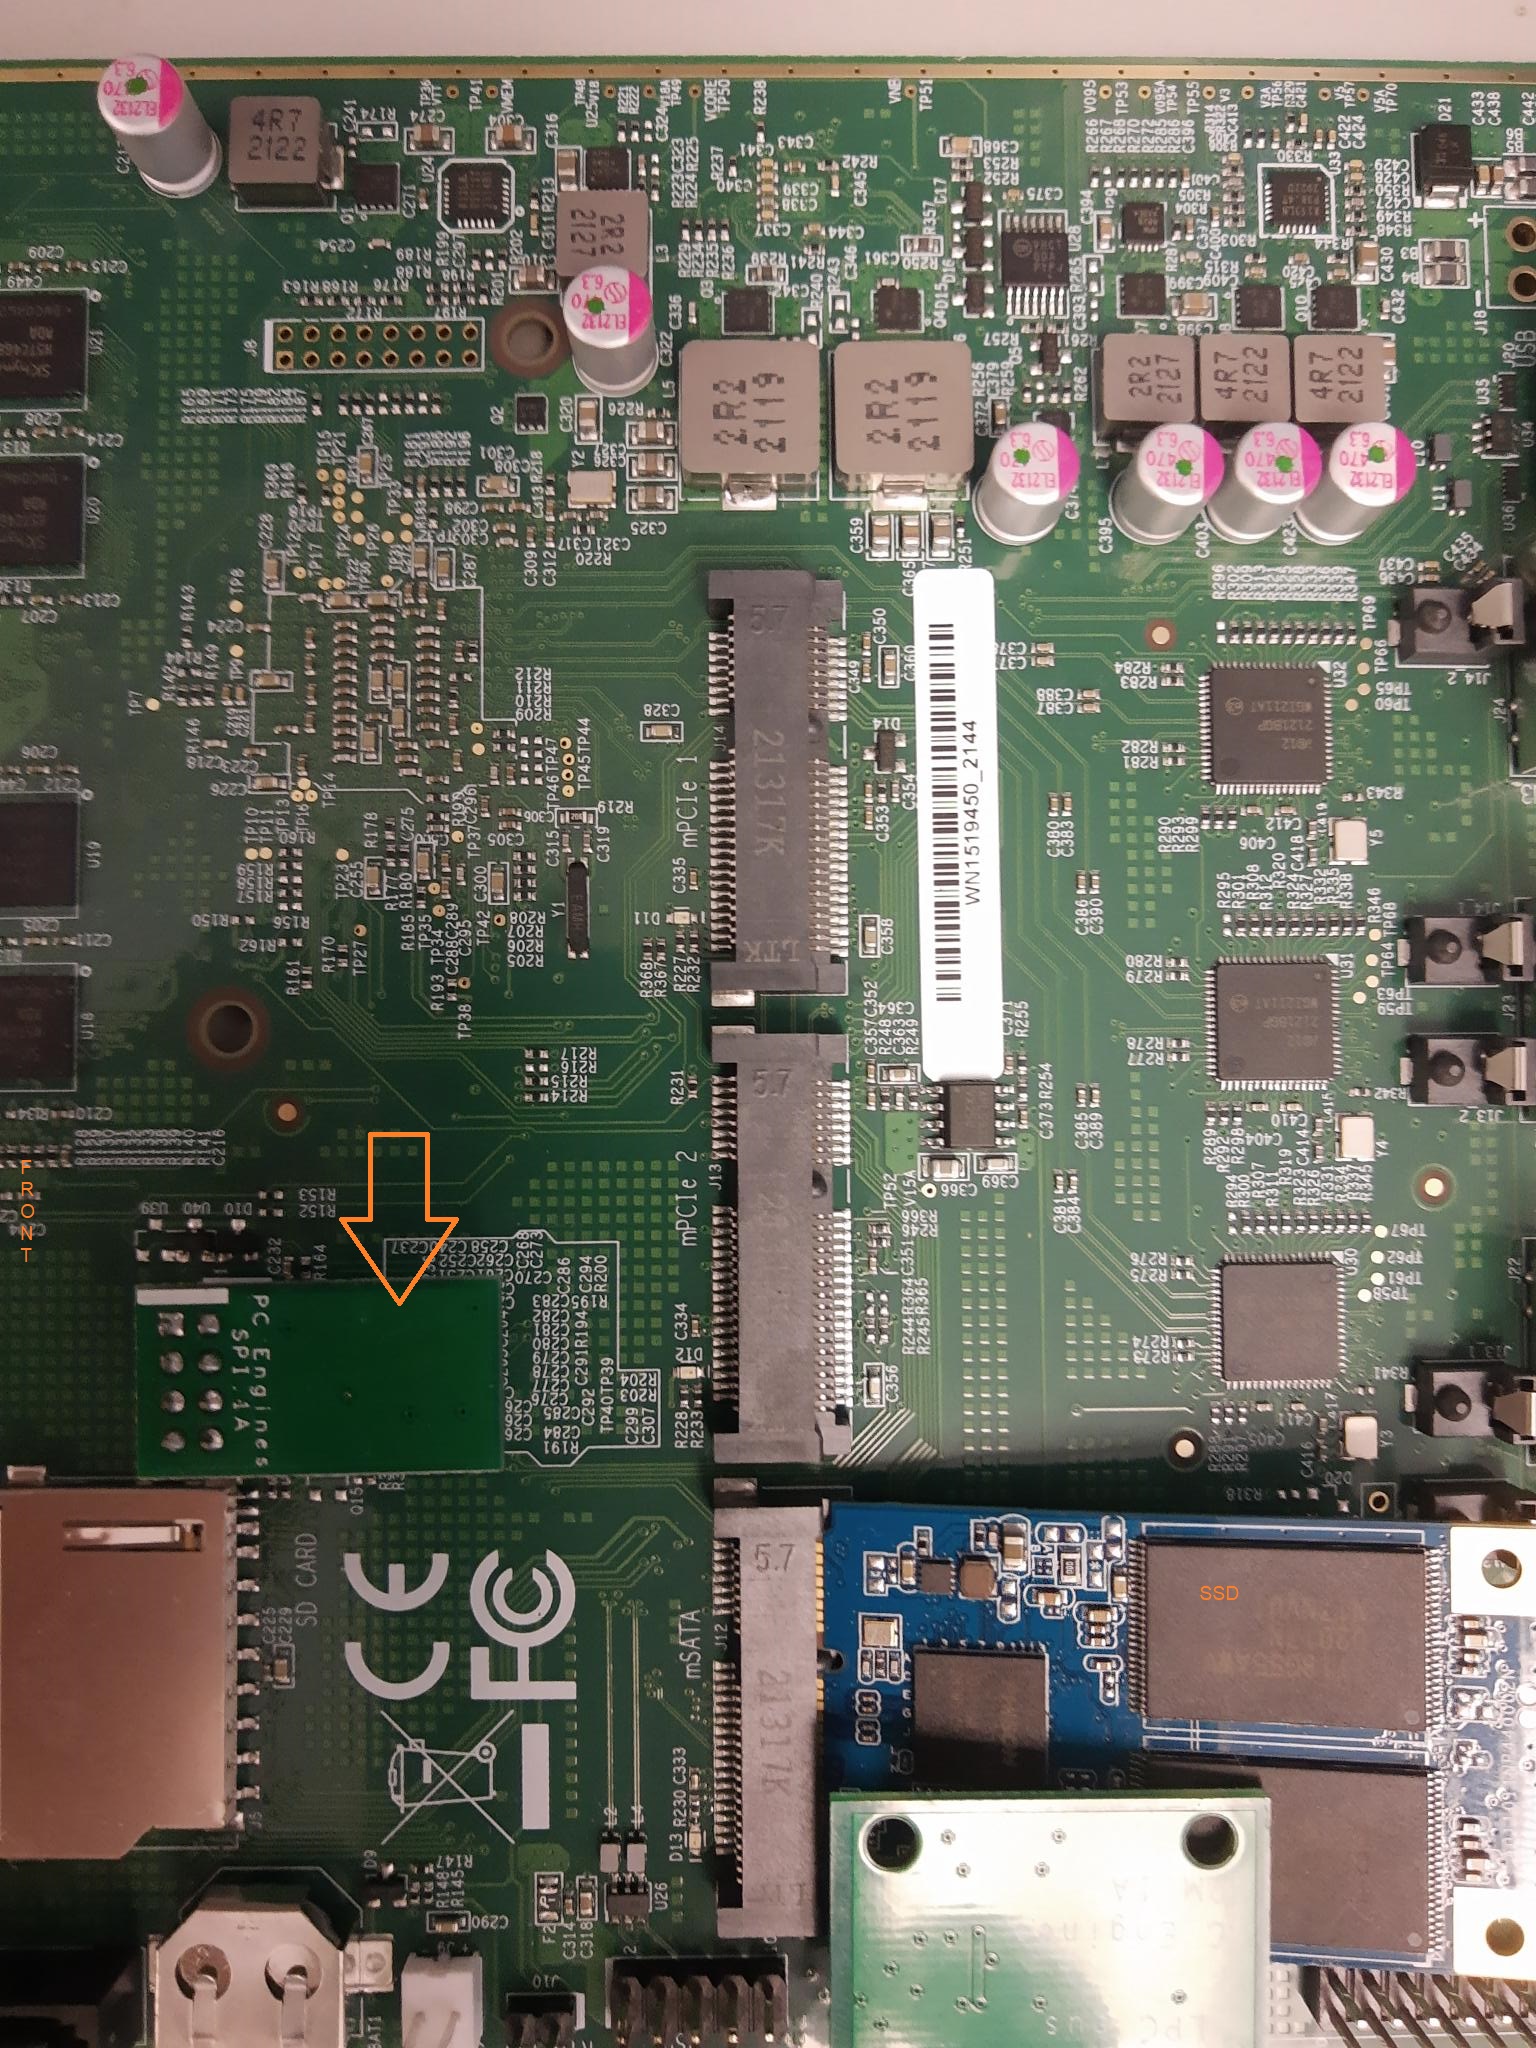
- Once received, unplug Polisy, open the screws on the four corners, and install it as shown in the image below
- Plug Polisy back in
- Immediately after the unit is up and while still plugged in, unplug the Flash Chip, then SSH to polisy and run the following commands:
- sudo pkg update && sudo pkg upgrade and wait for completion
- sudo /usr/local/etc/udx.d/static/udxops.sh update.bios.force
- Wait for the unit to reboot
Polisy OS Versions Below 13
If the above process does not work, you will need an ssh utility (such as Putty) to connect to Polisy over the network:
ssh admin@polisy-ip (you should change polisy-ip to the IP address of your unit). Default password is admin. Once this process is done, please change it
Run the following commands:
- sudo uname -a
If the OS is below 13, you have a few choices:
- If your Polisy is more than 2 years old
- You can purchase a brand new and updated SSD from here
- If you are a geek, you can reflash your SSD yourself. Please submit a ticket
- If your Polisy is more than 1 and less than 2 years old
- Please ship to
Universal Devices
c/o Reflash
5435 Balboa Blvd.
Suite 205
Encino, CA 91316
Please make sure you include your return mailing address.
- If your Polisy is less than 1 year old, please submit a ticket and request for RMA
- Steps to change ssh password:
Upgrade Process - As of July 2022
Please see this important update (July 2022)
Unless explicitly requested by Universal Devices, the SSH method of updating the Polisy should be avoided. Due to recent updates to the underlying operating system, unexpected consequences are being experienced when users force a full package upgrade and update using SSH.
To update/upgrade your Polisy, please only use the Admin Console to the ISY on Polisy (IoP).
Current suggested method for updating:
ISY Launcher to open the ISY Finder window.
Once logged in navigate to:
- Configuration tab
- System
Then click: “Upgrade Packages”
This updating/upgrading process through Admin Console has been developed to handle downloading the proper packages from Universal Devices servers to update UD specific libraries and dependencies needed to keep the Polisy operating efficiently and as designed.
Cool Integrations
This section shares interesting and useful applications of the Polisy controller submitted by our users so that others can benefit from the work already done. If you have an integration that you think other users would enjoy, please feel free to share it with us and we will work with you to add it to this section.
Conserving Irrigation Water
For a description of how to use Polisy to automatically adjust your landscaping watering times based upon the current weather conditions in your area, please click on the link below. This can allow you to save up to 75% on your water bill and still provide your plants with all the water they actually need.
Conserving Irrigation Water
Collecting and Graphing Data
For a description of how to use Polisy to collect data points about your house (ex: A/C run time every hour, #of minutes doors are left open, etc.) and produce a graph of data over time using Excel, please click on the link below.
Collecting and Graphing Data
Bridging Older Serial Based Systems to Polisy
For a description of how to use Polisy to use sensor data from an older serial-based system (an older alarm system, etc.), please click on the link below. For example, this would allow both your old alarm system and the Polisy to use the same door and window sensors that are already present on your alarm system - even though they are not Z-Wave.
Bridging Older Serial Based Systems to Polisy
Optimizing A/C Power Usage
For a description of how to use Polisy to automatically adjust your A/C cooling level based upon current weather conditions and time of day to reduce your power bill and extend the life of your A/C unit, please click on the link below.
Optimizing A/C Power Usage
Making a Z-Wave Push Button
It is surprisingly difficult to find a simple Z-Wave push button device to allow the user to trigger a set of actions when a button is pressed. Here is a quick guide on how to make your own push button.
Making a Z-Wave push button
