ISY-99i/ISY-26 INSTEON:Using the Event Viewer
The Event Viewer provides a real-time display of traffic occurring on the INSTEON network, which may be saved to a log file.
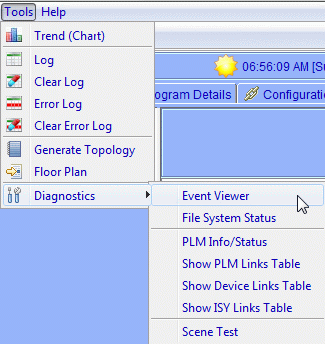
To open the Event Viewer, open the Tools menu Diagnostics sub-menu, and choose Event Viewer.
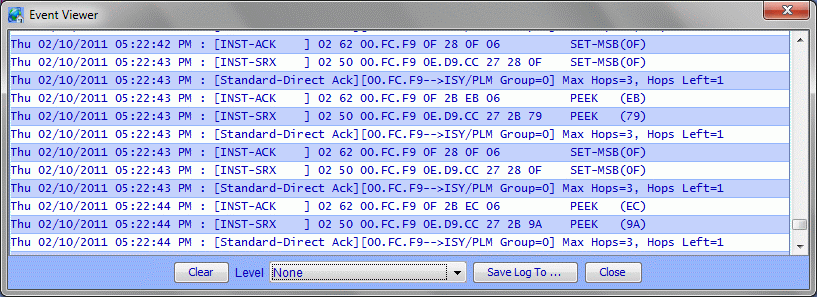
The Event Viewer window may be sized. At the bottom of the window are buttons to Clear the window, Save Log To ... a file, andClose the window. The Level drop-down allows setting the display level to None, Status/Operational events, More Info, or Device communications events. The default (when the window is opened) is Status/Operational events.
| 0 - None | No progress information. | |||
| 1 - Status/Operational events | Normal events. | |||
| 2 - More Info | Normal events and scheduler/trigger firing events. | |||
| 3 - Device communications events | Hop count, group, and debugging information added. |
The display level corresponds to the Debug level in the ISY Shell. The Event Viewer window displays the same information as is found in the Java Console, but without the necessity of telneting to ISY and using the DBG command in order to set the Debug level.
- In this image the ISY was reading (PEEKing) the link database on a device at level Device communications events.
None Stops events from being shown in the Event Viewer. Useful when you have captured a series of events and wish to view them without the information scrolling.
- In this image a device was sent an On command.
With Status/Operational events, each event is presented on one line in the Event Viewer window. Each event line displays the following columns: the date, the time, a colon, a bracketed column containing the device's INSTEON address or the term X10, the action code, and a parameter value.
For X-10 devices, the action code may be the device's X-10 address, or the X-10 command. A complete X-10 command sequence consists of two parts: the House/Unit code of the device being addressed, followed by the House/Command code of the command. Since each of these two parts is actually a separate command, each is displayed as an individual event. Some X-10 commands, such as All Off, don't require a separate House/Unit code, and are therefore a single event. The number in parenthesis is the actual X-10 command code. A complete list of X-10 command codes may be found on the Program Commands page.
For INSTEON devices, the action code may be one of:
| DON | Device On | |||
| DOF | Device Off | |||
| DFON | Device Fast On | |||
| DFOF | Device Fast Off | |||
| BMAN | Begin Manual Change | |||
| SMAN | Stop Manual Change | |||
| OL | On-Level | |||
| RR | Ramp-Rate | |||
| ST | Status |
For the On-Level and Ramp-Rate commands, the parameter is the on-level or ramp-rate being set, respectively. For the Begin Manual Change command, the parameter is '1' for a Fade Up, and '0' for a Fade Down. The parameter for the Status command, is the value returned by that command; usually the current on-level.
- In this image a device was Querried.
With More Info, in addition to the information displayed by Status/Operational events, the Event Viewer displays more detailed informational lines, the most important of which are:
| INST-ACK | The PLM responded to a command sent by ISY (usually an echo). i2 ACKs are longer (23 bytes). | |||
| INST-SRX | The receiving device has either responded to a command from ISY or is sending an event. This is the standard length message (i1). | |||
| INST-ERX | Like INST-SRX, but extended length and returned by i2 devices. |
- In this image a device was turned Off and it sends a command to the ISY.
Device communications events adds to the information displayed by More Info. It adds Group numbers, hop counts and debugging information.
In general, things work like this:
| Sending a request from ISY (i1) | ---->Send Request---->Receive INST-ACK-(Wait for Response)---->Receive INST-SRX. Timeout means that either INST-ACK or ISNT-SRX did not come within allotted time (4 seconds). | |||
| Sending a request from ISY (i2) | ---->Send Request---->Receive INST-ACK-(Wait for Response)---->Receive INST-SRX---->Receive INST-ERX. | |||
| Receiving events from devices | ---->Receive INST-SRX |
Decoding the Information
- Once the Event Viewer is begun during a session at the Administrative Console it can be closed and will retain the information it has.
- Use the Clear button to start a new test.
- Set to a higher level the window will fill faster but will display more complete diagnoses.
- Set the Level to None when your test is done to stop scrolling the window.
- The Events can be saved Using the Save Log... button.
Related Pages


