ISY-99i Series INSTEON:Networking:Tasker
To push device and scene state from ISY to Tasker - please see this [[1]]
This page is a work in progress!
Network Awareness
First, it is helpful if Tasker can use the HTTP interface when on the same network, and HTTPS when not. This should probably not be used for geofencing your home - as Android devices will sleep and disconnect sometimes. This set of tasks and profile is simply so that Tasker has a reliable way to call the ISY API...
Once you have installed Tasker, perform the following steps:
Click the three dots top-right - and select 'Preferences'
Uncheck 'Beginner Mode'
Set the 'Theme' to 'Dark' (saves battery!)
Hit 'Back' (gear icon in the top-left of screen)
Now, let's create the first task, step by step: (CaSe is important)
Click the 'Tasks' tab (top of screen)
Click + (bottom right of screen)
Set the task name to 'Home-On-Net' and touch the check-mark
Click the + bottom center of screen
In the 'Filter', type 'variable. Scroll and select 'Variable Set'
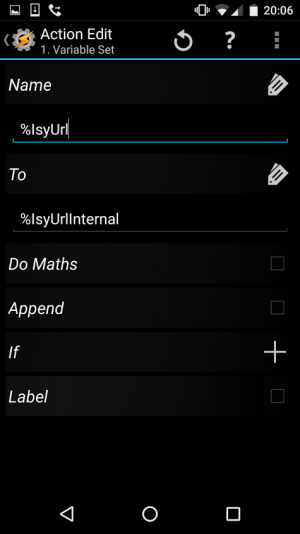
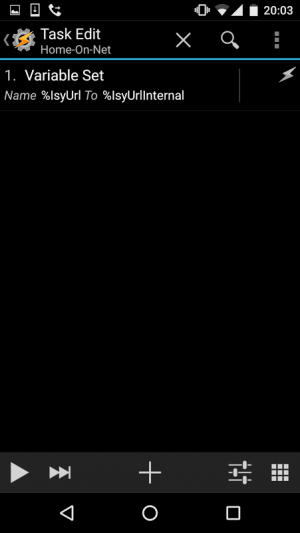
In the 'Name' box, type '%IsyUrl'
In to 'To' box, type '%IsyUrlInternal'
Hit 'Back' (gear icon in the top-left of screen)
Click the + bottom center of screen
In the 'Filter', type 'variable. Scroll and select 'Variable Set'
In the 'Name' box, type '%URLPrefix'
In to 'To' box, type '/'
Hit 'Back' (gear icon in the top-left of screen)
Hit 'Back' again (gear icon in the top-left of screen) to return to the list of tasks..
Now, let's create the second task, step by step: (CaSe is important)
From the 'Tasks' tab...
Click + (bottom right of screen)
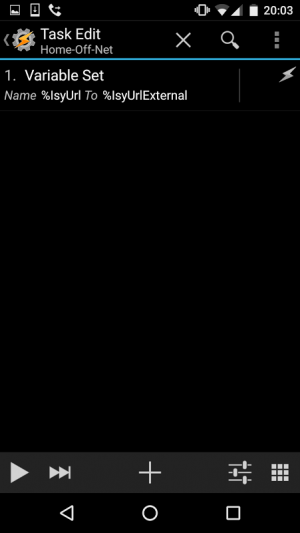
Set the task name to 'Home-Off-Net' and touch the check-mark
Click the + bottom center of screen
In the 'Filter', type 'variable. Scroll and select 'Variable Set'
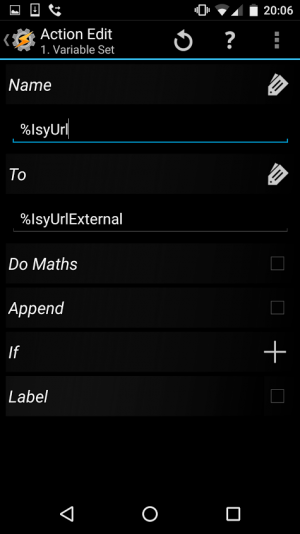
In the 'Name' box, type '%IsyUrl'
In to 'To' box, type '%IsyUrlExternal'
Hit 'Back' (gear icon in the top-left of screen)
Click the + bottom center of screen
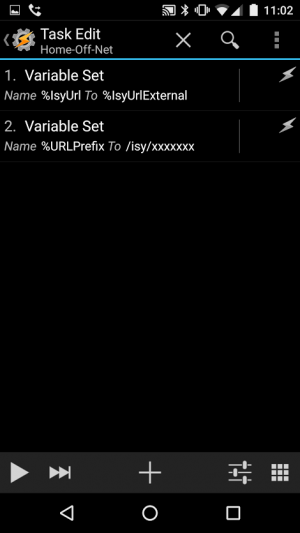
In the 'Filter', type 'variable. Scroll and select 'Variable Set'
In the 'Name' box, type '%URLPrefix'
If NOT using ISY Portal:
  In to 'To' box, type '/'
If you ARE using ISY Portal:
  In to 'To' box, type '/isy/<secure_isy_id>' (get the ID from 'Tools' / 'Information' / 'ISY Information' in my.isy.io. It's the 'Path to ISY' URL component)
Hit 'Back' (gear icon in the top-left of screen)
Hit 'Back' again (gear icon in the top-left of screen) to return to the list of tasks..
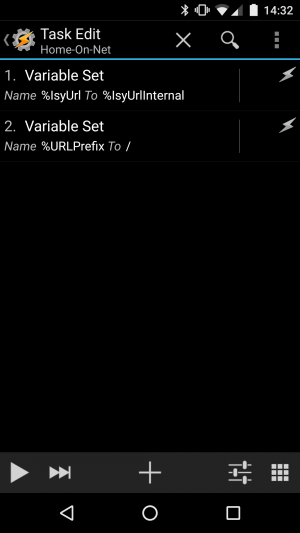
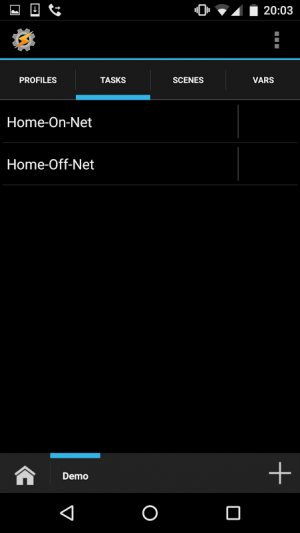
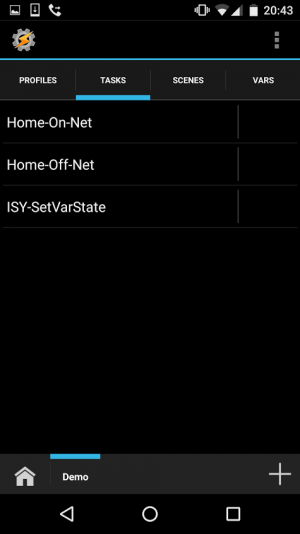
After creating the tasks above, the Tasks tab should look like this:
Now, lets set a couple of variables...
Click the 'VARS' tab (top of screen)
Near the bottom of the screen - if you don't see buttons labeled 'Indexed' and 'Empty', click the ^ in the far bottom-right.
Ensure 'Empty' is lit up...  if not, click the 'Empty' button to display empty variables
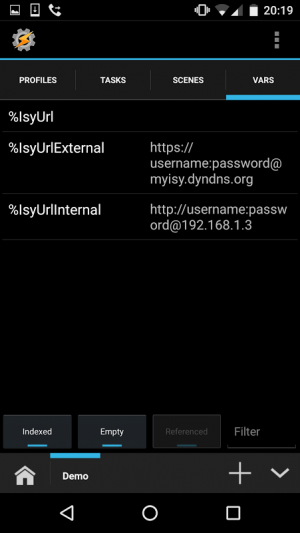
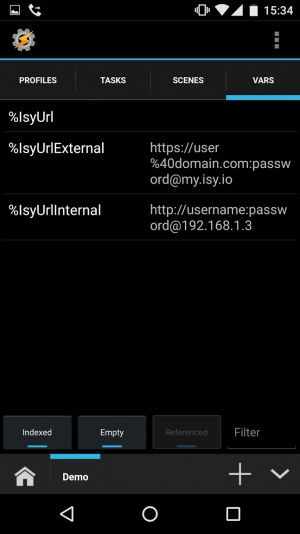
You should see the '%IsyUrl' '%IsyUrlExternal' and '%IsyUrlInternal' variables
Touch '%IsyUrlInternal' and enter the internal URL (in the format 'http://user:password@192.168.1.3'). Touch the check to save
Touch '%IsyUrlExternal' and enter the external URL for your ISY (or Portal URL), and save it.
   Internal: http://user:password@192.168.1.3
   External direct to ISY: https://username:password@myisy.dyndns.org
   External Via Portal: https://username:password@my.isy.io
If you use the ISY Portal - you might have to URL encode the username (since it has a @ in it). @ encodes to %40. Test without encoding first.
Leave '%IsyUrl' blank..
At this point, your variables should look like this (Except of course the correct IP address, external URL, username and password entries are used!. The left image is if you are connecting directly - and the second one is if you are connecting via ISY Portal):
Exit Tasker and re-launch (This is to save the tasks - so we can create profiles that refer to them)
Now, let's create the first profile:
Click the 'Profile' tab
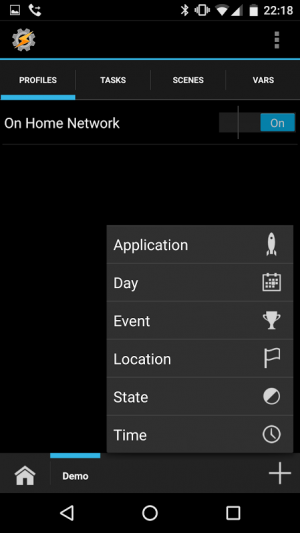
Click the + bottom-right
Click on 'State'
In the 'Filter' - type 'wifi'
Touch 'Wifi Connected'
Next to 'SSID' - touch the magnifier.
 Select the SSID of your home network - where the ISY is. If you have more than one SSID - select each in turn until they are all added
Next to 'MAC' - touch the magnifier.
 Select the Mac of your home network - where the ISY is. If you have more than one - select each in turn until they are all added
 (It's important to use the MAC as well as the SSID - so your device does not treat a spoofed SSID as your home network - and switch to no SSL..)
Hit 'Back' (gear icon in the top-left of screen)
You are prompted to select the entry task...  touch 'Home-On-Net'
In the list - touch and hold 'Home-On-Net'. From the popup menu, touch 'Add Exit Task'
Touch 'Home-Off-Net'
Touch and hold the profile name. Click the 'A' icon at the top of the screen
Set the name to 'On Home Network', and hit the check.
Hit the Android back button - Tasker should exit.
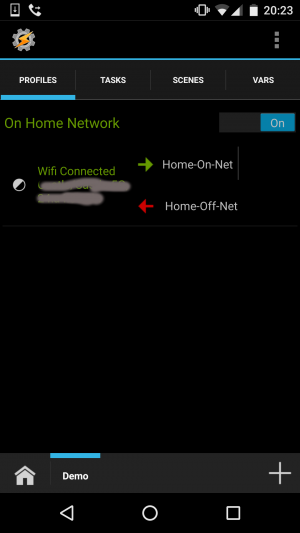
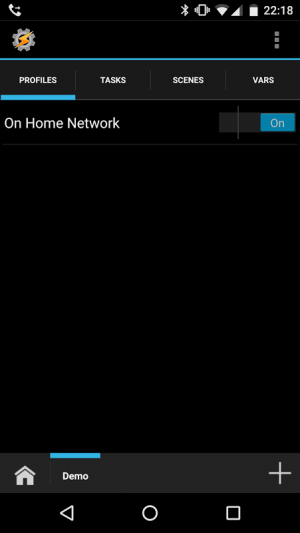
The profile tab should look like this when done:
The profile name is green when it's active...
At this point - if you drop the Android notifier, you should see a Tasker notification proclaiming 'On Home Network'. Click it - Tasker will open. Click the 'Vars' tab, you should see that %IsyUrl has been set to the internal URL..
Base task dependencies
Before you complete this step - please complete the steps outlined in 'Network Awareness' section.
Let's create the first 'meta' task... These tasks are called by other processes to utilize the ISY API.
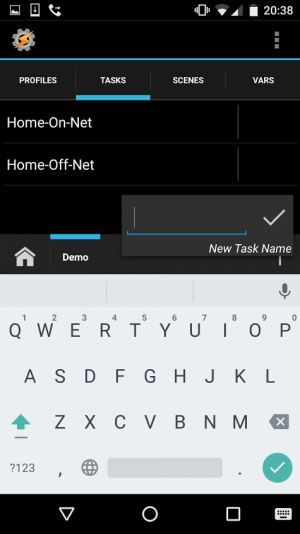
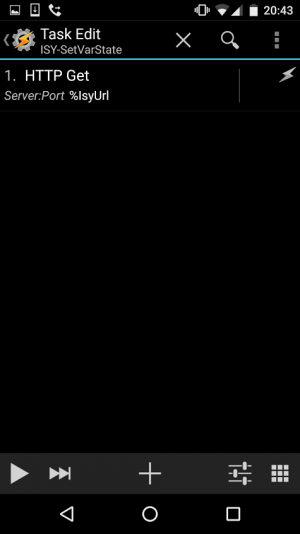
From the 'Tasks' tab... Click + (bottom right of screen) Set the task name to 'ISY-SetVarState' and touch the check-mark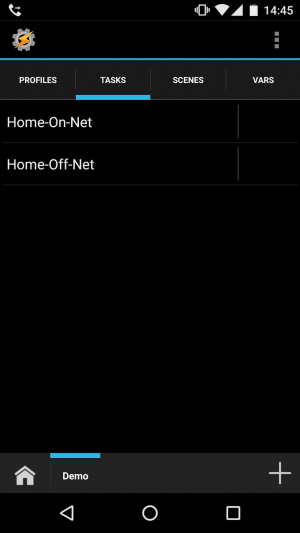
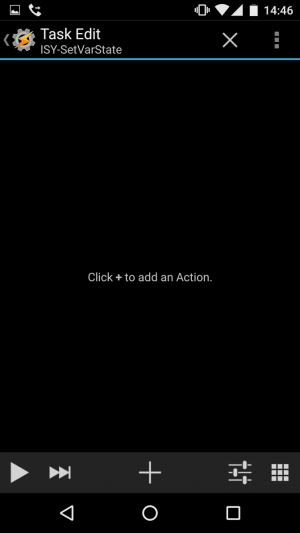
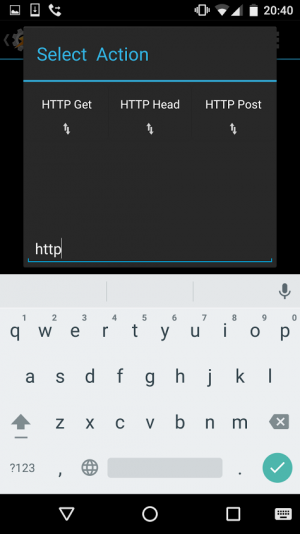
Click the + bottom center of screen In the 'Filter', type 'http' Touch 'HTTP Get'
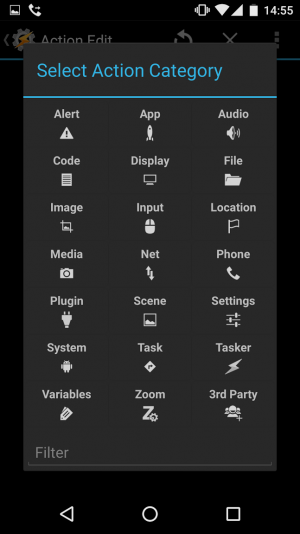
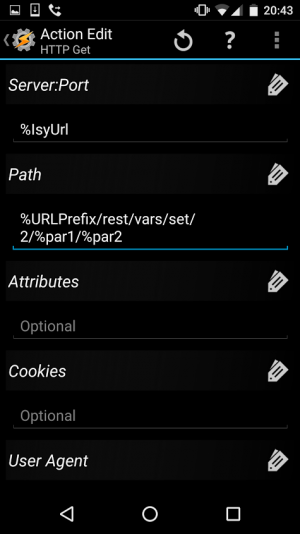
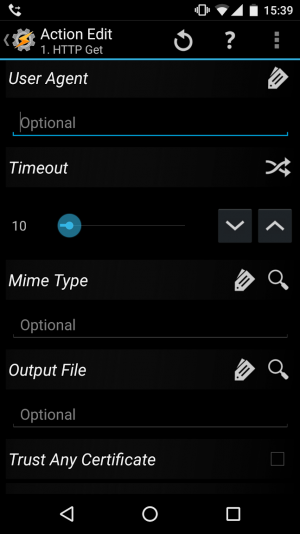
In the 'Server:Port' box, touch the 'Tag' and select '%IsyUrl' In to 'Path' box, type '%URLPrefix/rest/vars/set/2/%par1/%par2' If you are using a self-signed certificate on your ISY (and not the portal) - scroll down and check 'Trust Any Certificate' Hit 'Back' (gear icon in the top-left of screen) Hit 'Back' again (gear icon in the top-left of screen) to return to the list of tasks..
Now - use the above process to create these additional 'meta-tasks':
ISY-SetVarInteger	'Net' 'HTTP Get' / Server:Port = '%IsyUrl' / Path = '%URLPrefix/rest/vars/set/1/%par1/%par2'
ISY-RunIf		'Net' 'HTTP Get' / Server:Port = '%IsyUrl' / Path = '%URLPrefix/rest/programs/%par1/run'
ISY-RunThen		'Net' 'HTTP Get' / Server:Port = '%IsyUrl' / Path = '%URLPrefix/rest/programs/%par1/runThen'
ISY-RunElse		'Net' 'HTTP Get' / Server:Port = '%IsyUrl' / Path = '%URLPrefix/rest/programs/%par1/runElse'
ISY-SceneOn		'Net' 'HTTP Get' / Server:Port = '%IsyUrl' / Path = '%URLPrefix/rest/nodes/%par1/cmd/DON'
ISY-SceneOff		'Net' 'HTTP Get' / Server:Port = '%IsyUrl' / Path = '%URLPrefix/rest/nodes/%par1/cmd/DOF'
ISY-ExecNet		'Net' 'HTTP Get' / Server:Port = '%IsyUrl' / Path = '%URLPrefix/rest/networking/resources/%par1'
ISY-WOL			'Net' 'HTTP Get' / Server:Port = '%IsyUrl' / Path = '%URLPrefix/rest/networking/wol/%par1'
In-Car Detection
First - the steps outlined in 'Network Awareness' and 'Base Task Dependencies' must be completed.
I've found the most reliable way to do in-car detection is bluetooth. Either to your cars built-in bluetooth - or using a device like a ZUS (http://www.amazon.com/gp/product/B015F34P1Q) or any other bluetooth device plugged into the accessory outlet.
First, create a 'State Variable' on the ISY called 'In Car'. Set it's 'init' value to 2. Make a note of it's ID number. For purposes of example, I'm going to say mine is 23.
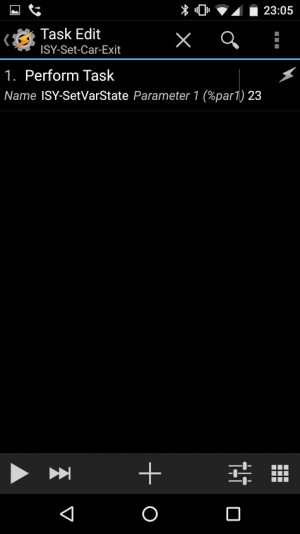
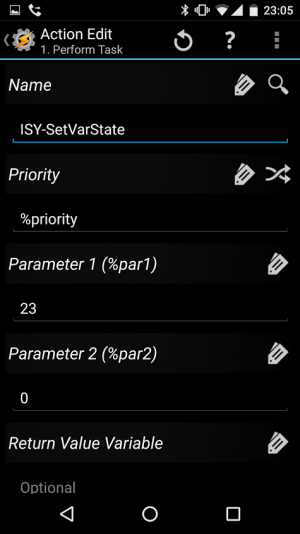
Create two tasks (follow the steps in the second box of Network Awareness') using data in this table:
ISY-Set-Car-Enter Perform Task / ISY-SetVarState %par1=23 %par2=1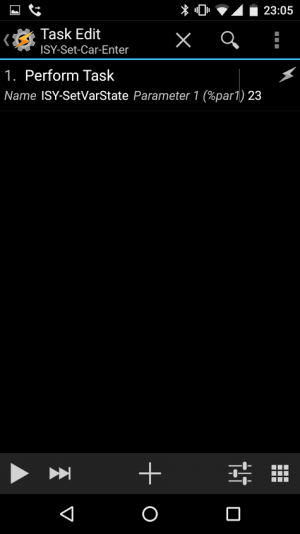
ISY-Set-Car-Exit Perform Task / ISY-SetVarState %par1=23 %par2=0
Now, pair your phone with the bluetooth device. This is necessary to cause your phone to automatically connect when the device powers up (in your car).
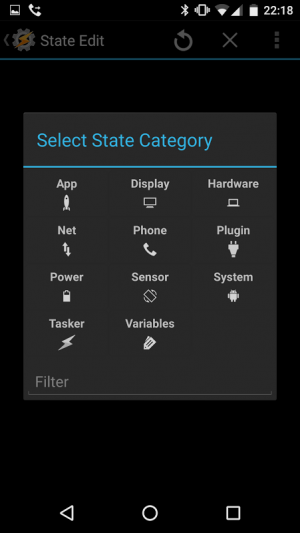
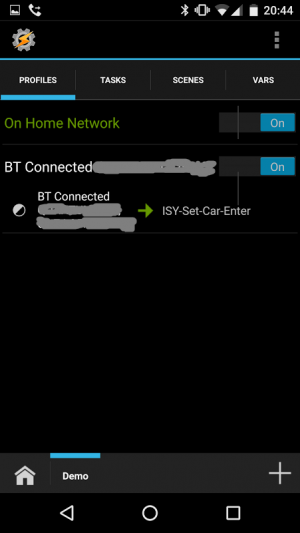
In Tasker, add a 'State' profile.
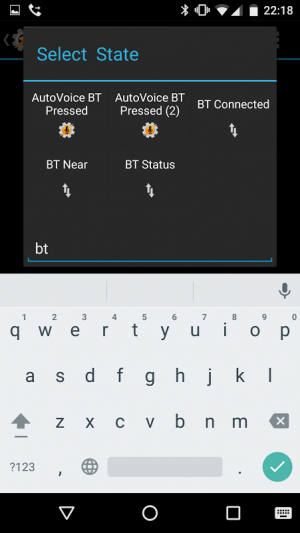
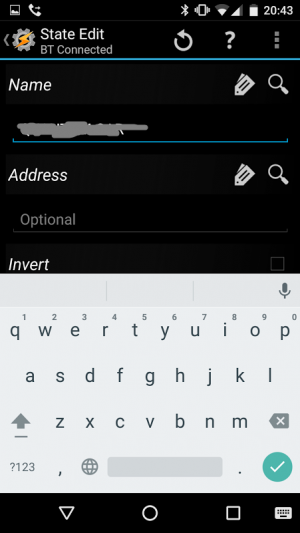
In the filter, type 'BT' and then select 'BT Connected'
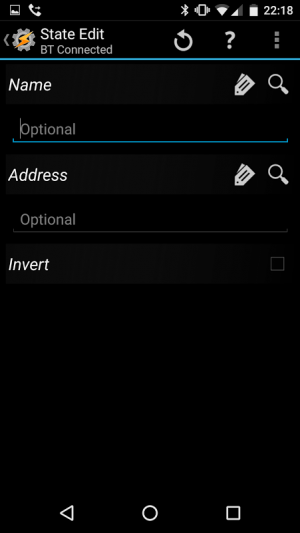
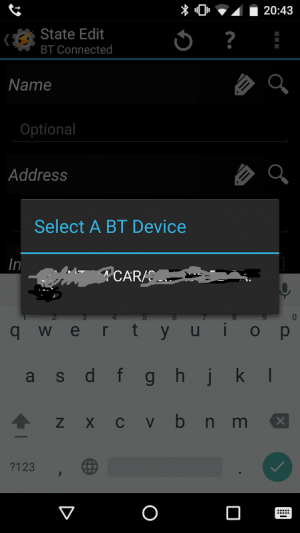
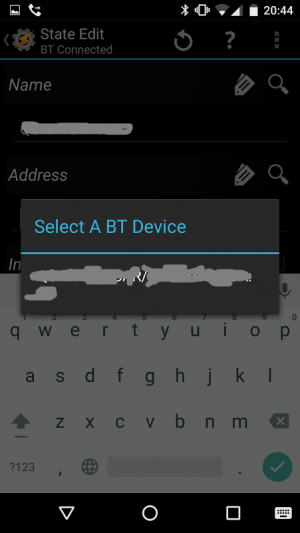
For the 'Name', click the magnifying glass and select your bluetooth device.
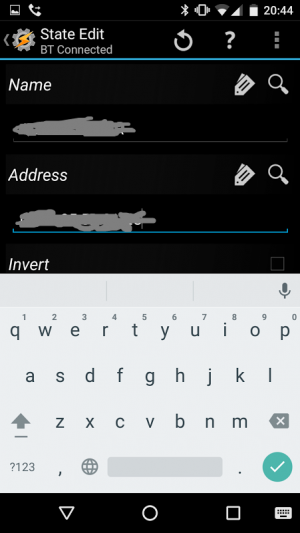
For the 'Address', click the magnifying glass and select the same bluetooth device as for the name.
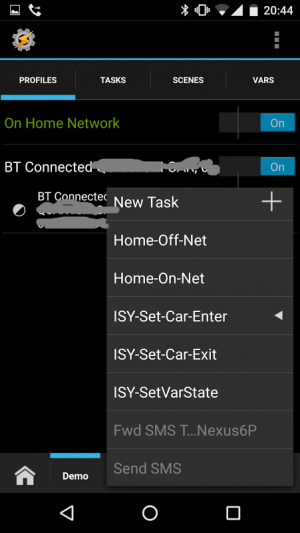
Hit 'Back' and select 'ISY-Set-Car-Enter' as the task to run.
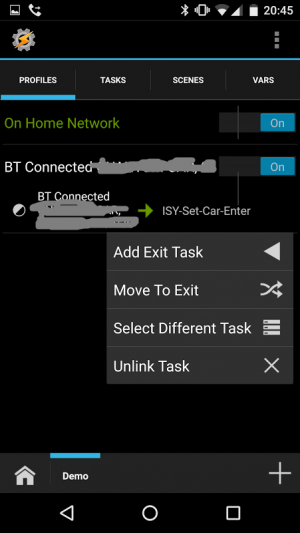
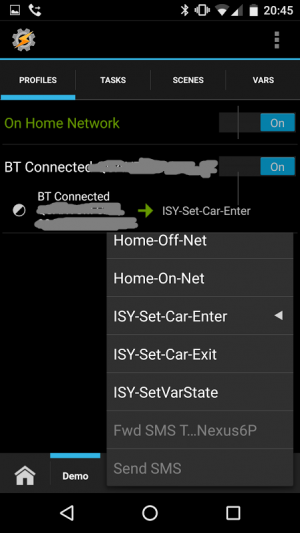
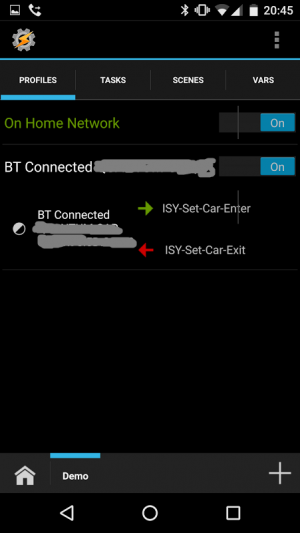
In the profile list, long-press the 'ISY-Set-Car-Enter' task, and select 'Add Exit Task' select 'ISY-Set-Car-Exit' as the task to run when exiting the car.
Manually run the 'ISY-Set-Car-Exit' task the first time (while not in the car!), and verify the 'In Car' variable changes from '2' to '0'.
Geofencing
For effective geo-fencing on Android - add the AutoLocation module to Tasker (https://play.google.com/store/apps/details?id=com.joaomgcd.autolocation). After 7 days, you'll have to buy the unlock key (https://play.google.com/store/apps/details?id=com.joaomgcd.autolocation.unlock). If your phone supports it - this hooks into the hardware based geofencing that newer Android devices have.
Again - the steps outlined in 'Network Awareness' and 'Base Task Dependencies' must be completed before this section. They not only setup prerequisites - but they also server as a tutorial on adding 'Tasks' and 'Profiles' to ISY.
First - ensure the Autolocation Geofence monitor is set to run on boot:
Create a 'task' called 'Start Geofence'
In the filter, type 'autolocation' and select 'AutoLocation Geofences'
Click the 'Configuration'
Click 'Geofence Monitor'
Select 'Start'
Click the 'Check' to accept..
click 'Back' to return to the list, and then back again.
Create a 'Profile' by clicking +
Select 'Event'
In the filter, type 'device' and select 'Device Boot'
There are no options to configure for this event, so hit 'Back'
Select the 'Start Geofence' task you just created.
This will cause the geofence monitor to start when the Android device starts.
Now, create a 'State Variable' on the ISY called 'At Work'. Set it's 'init' value to 2.
Make a note of it's ID number. For purposes of example, I'm going to say mine is 28.
Create two tasks:
ISY-Set-Work-Arrive		Perform Task / ISY-SetVarState	%par1=28 %par2=1
ISY-Set-Work-Leave		Perform Task / ISY-SetVarState	%par1=28 %par2=0
Configure a geofence in AutoLocation
Open 'AutoLocation' and click 'Manage Geofences'
Click + to add a new Geofence
In the map, select the center of the location you wish to fence..
Adjust the size of the fenced area with the slider, and then click 'Accept Geofence'.
Give it a name - 'Work'.

Back on the list - Autolocation will tack on 'Inside' or 'Outside' as appropriate..
Click 'Start Monitor' under the 'GEOFENCES' section..
Finally, create the Tasker profile that ties it all together:
Create a new profile:
'State' 'Autolocation Geofences'
For 'Configuration', select the 'Geofence Name' 'Work'.
For 'Status' - select 'Inside'
Click the 'Check' then hit 'Back'
select 'ISY-Set-Work-Arrive' as the task to run on entering the geofence.
In the profile list, long-press the 'ISY-Set-Work-Arrive' task, and select 'Add Exit Task'
select 'ISY-Set-Work-Leave' as the task to run when exiting the geofence.
Device Toggles
Again - the steps outlined in 'Network Awareness' and 'Base Task Dependencies' must be completed before this section. They not only setup prerequisites - but they also server as a tutorial on adding 'Tasks' and 'Profiles' to ISY.
On my ISY - I have a device (a Switchlinc) called 'Dining Room Overhead' - and it's in a folder 'Main / Dining /' I also have a scene 'SC - Dining Room Overhead' in folder 'Main / '. The Switchlinc is a controller of the scene - and is also the switchlinc attached to the load. There are other Switchlincs in the scene.
The goal is to have a task on Tasker that simply toggles the state of the light - without having to know the current state. I do this with a DISABLED program on ISY (so it does not trigger on any element of the IF clause) and have the IF branch based on the current state..
On ISY, create a DISABLED program like the following:
If
        Status  'Main / Dining / Dining Room Overhead' is not Off
Then
        Set Scene 'Main / SC - Dining Room Overhead' Off
Else
        Set Scene 'Main / SC - Dining Room Overhead' On
Test the program by manually performing a 'RunIF' - and abserving the light toggle - with all scene controllers and responders staying in sync.
Over on the program summary tab, make a note of the Program ID (in my case - 01D0).
On Tasker, create the following task:
ISY-DiningRoom-Toggle Perform Task / ISY-RunIf %par1=01D0
...and test. Each run of the task toggles the light on and off.
