ISY ZWave 500 Series Cert:Certification Guide
ISY-994ZW Z-Wave Certification : Certification Guide

Case #52639
General Information
- A Z-Wave device is represented in the device tree as one or more nodes. For example, a thermostat with energy meter support will have two nodes; one for the thermostat and one for the energy meter.
- On occasion after a Z-Wave device is added to the ISY, the Admin Console will not be fully refreshed:
- If at any time you do not see expected nodes (or see unexpected nodes) in the tree, the nodes in the tree can be synchronized with those in the Z-Wave network by doing Z-Wave | Synchronize Nodes | New & Deleted from the top level menu:
- Deleting a node from the tree does not exclude the device from the Z-Wave network. If you delete a node then doing a synchronize will bring it back.
- Although most of the certification test cases require only the documentation we provide our customers, this document contains additional instructions needed to run some of the test cases.
- If you see the following in the top level Z-Wave menu after you start the ISY then the Z-Wave module is still initializing (it takes about 30 seconds after ISY starts for Z-Wave initialization to finish). The menu will automatically update after Z-Wave is initialized
Learn Mode
- Whenever the ISY goes into Learn Mode you will see a Z-Wave Learn Mode popup
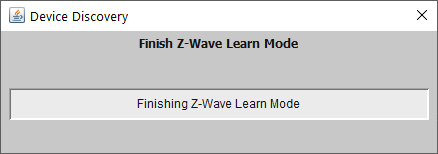
- After the Z-Wave system level learn mode is complete you will see a Finish Learn Mode popup that remains for 15 to 40 seconds
- In most cases, a System Busy popup will appear after the Finish Learn Mode popup goes away and the ISY will begin to query one or more devices in the network
- When running the test cases, it is important to wait until this is complete before moving on to the next step
CTT Test Cases
- PowerLevel command class test cases require $timeToWait to be increased
- Z-Wave Plus Tester - Device Type Command Classes will show as failed because we do not support S2 security (we have an S2 waiver)
- Some test cases (CTT or otherwise) require you to send a NIF from the ISY. To do this, open a web browser and go to the following URL. Go to Help | About in the Admin Console to find your IP address.
- (YourIsy)/rest/zwave/sendNodeInfoFrame (e.g. 192.168.0.1/rest/zwave/sendNodeInfoFrame)
Admin Console
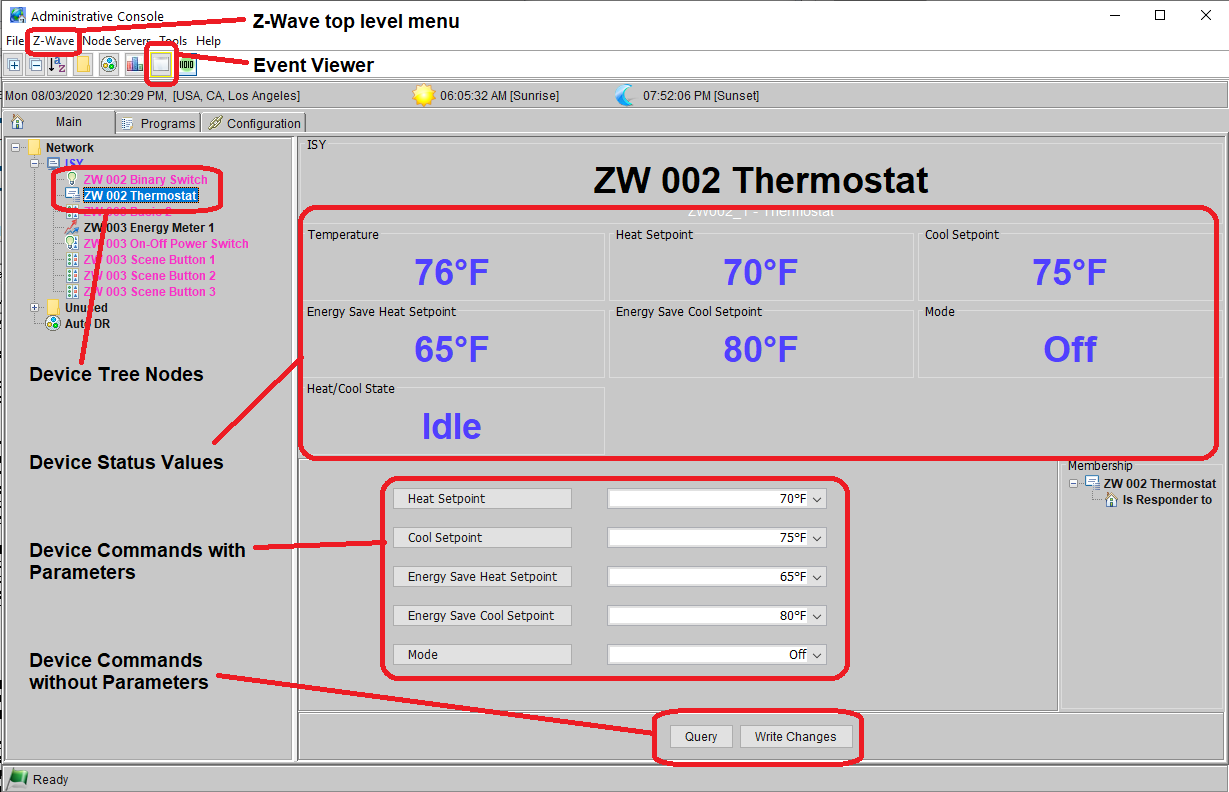
The Administrative Console (Admin Console) is the main GUI interface to the ISY. When a Z-Wave Device Tree Node is selected, the Device Status Values are shown in large font at the top of the page, and the Device Commands are shown at the bottom of the page. Some Z-Wave devices are represented as multiple device tree nodes. In this example, the thermostat also has a binary switch, which is represented in a different node.
You may want to open the Event Viewer to see additional information as commands are attempted/running, as status is received, etc.
Node Level Menu
When you right+click on a Z-Wave node in the device tree, a node level menu appears. This menu changes depending on the capabilities of the Z-Wave node.
See Node Level Menu
Commands
Device commands may be issued from the device page in the Admin Console or from ISY programs. On the device page you will see a cycle button beside parameters that are optional. In programs you will see this as well, but in addition, you can specify an ISY variable as a parameter rather than a literal value.
The cycle button allows you to cycle through all the options for the parameter.
Basic Node
To directly control the Basic command class for a device you can create an optional Basic Node. Once created you can set the value (using the On and Off commands), and get the value (using the Query) command. To create the node, use the node level menu on any ISY node for the device (right+click, Z-Wave | Add/Refresh Basic Node). If you do not see this in the menu then the device does not support the Basic command class.
Creating Associations
ISY scenes are used to create associations.
- Create a scene by pressing the
 button (in the row of top level buttons)
- You will see the new scene in the device tree
- right+click on the Z-Wave controller node and select Add to Scene ...
- In the first popup menu, choose the scene you just created
- In the second popup menu, make sure to add it to the scene as a Controller
- right+click on the Z-Wave responder node and select Add to Scene ...
- In the first popup menu, choose the scene you just created
- In the second popup menu, make sure to add it to the scene as a Responder
- Under the scene node in the device tree you will see both the responder and controller that you added to the scene.
- Select the controller node under the scene in the device tree Note: It must be the one under the scene node, not elsewhere
- In the drop down box for the link between the controller and the responder you will see Default, Command, Ignore
- If the devices are association compatible then you will also see a Z-Wave xxxxx entry such as Z-Wave Basic, Z-Wave Basic S0, etc.
- Devices are association compatible if
- The responder supports the command class the controller sends out
- The responder and controller are operating at the same security level in the Z-Wave network
- The responder is a multichannel end-point and the controller supports multichannel association
- Create the association by selecting the Z-Wave xxxxx entry and pressing the Update button
- If you see a green icon in the device tree for the controller device then that means it hasn't written the association to the device yet.
- This only happens for battery devices that are not awake, or for devices that the ISY cannot currently communicate with.
- To write the association information, wake up the device.
- You can force the ISY to attempt to write the association by bringing up the node level menu (right+click, Write Updates to Device)
- You can associate more responders to the controller by adding them to the scene and following the same steps.


